
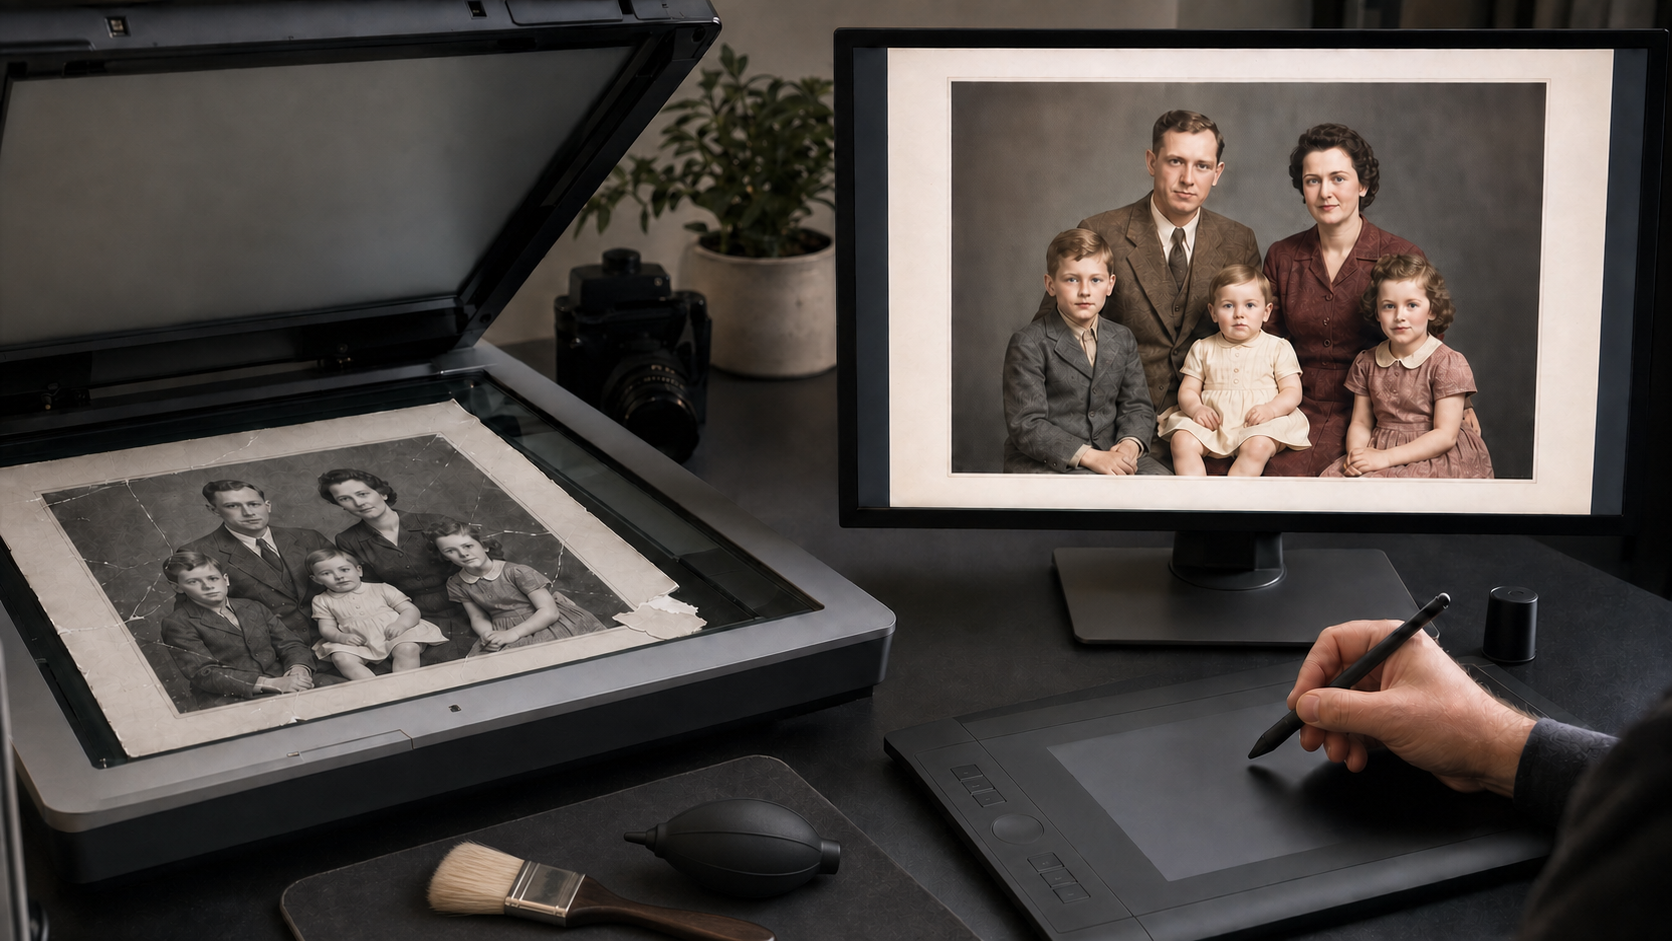
Old family photographs often survive long after the cameras, negatives and people connected to them are gone. Unfortunately, the prints themselves may fade, crack, tear, stain or become discoloured over time.
Professional photo restoration can create a clean new version of a damaged image while preserving the character of the original photograph. Even in a world of powerful AI tools, it is not simply a matter of pressing an automatic “repair” button. A good result begins with careful assessment and scanning, followed by controlled digital retouching based on the condition of the image and the way the restored photograph will be used.
Pixels Plus provides professional photo restoration services from its Crows Nest store for customers in Sydney, the Lower North Shore and beyond.
What does professional photo restoration mean?
In most cases, photo restoration is a digital process. The original photograph is carefully scanned or photographed at an appropriate resolution. Restoration work is then completed on the digital copy, rather than by painting, cleaning or physically altering the original print.
The completed image can be supplied as a digital file, made into a new photographic print or prepared for enlargement. The original photograph remains an important family object and should still be stored safely.
This is different from photographic conservation. A conservator works directly with the physical object to stabilise or treat the original material. Digital restoration focuses on recovering the appearance of the image and creating a usable new copy.
What types of photo damage can be repaired?
Every photograph is different, but professional digital restoration may help with:
- Fading and loss of contrast
- Yellow, red, blue or green colour casts
- Dust, spots and surface marks
- Creases, scratches and small tears
- Stains and areas of uneven discolouration
- Missing corners or damaged edges
- Mould marks visible in the image
- Cracks across faces, clothing or backgrounds
- Unwanted people or objects
- Poorly exposed or dull photographs
Some damage can be repaired almost invisibly. Other images require a more interpretive result, particularly when important detail is completely missing.
What has AI changed about photo restoration?
AI has made automatic scratch removal, face enhancement, colour suggestions, noise reduction and enlargement much faster. These tools can be useful, especially when a photograph contains hundreds of small marks or very weak detail.
The important question is not whether AI can make an image look cleaner. It is whether the finished image still looks like the same person, place and moment.
Generative AI works by predicting plausible detail. If the original photograph does not clearly show an eye, an ear, a hairstyle or part of a patterned dress, an AI tool may create something visually convincing—but that detail may not be historically accurate. Recent computer-vision research describes this as a difficult balance between visual quality and identity fidelity. A restored face can look sharp and realistic while becoming less faithful to the actual person.
This matters enormously with family photographs. A slightly imperfect but recognisable expression may be more valuable than a polished face that no longer resembles the relative people remember.
Professional restoration in the age of AI should therefore keep the original image as the reference. Automated tools may assist with repetitive work, but a careful restorer still needs to:
- Compare the edited image with the original throughout the process
- Protect distinctive facial features, expressions and body language
- Decide which marks are damage and which details belong in the photograph
- Avoid generating detail where there is no reliable visual evidence
- Use other family photographs as references when important areas are missing
- Manually correct artificial textures, repeated patterns and distorted features
- Explain when part of the result is interpretive rather than recovered
The best use of AI is as one tool within a controlled restoration process—not as a substitute for judgement, context and careful retouching.
Step 1: Assessing the photograph
The first step is to examine the photograph and discuss the intended result.
A small print needed for a family slideshow may require a different approach from a portrait that will be enlarged, framed and displayed. The amount of damage, the size and condition of the original, the required output size and the level of retouching all affect the work involved.
This is why restoration is normally quoted after the image has been assessed. Pixels Plus invites customers to bring photographs or slides into the Crows Nest store for a quote. Digital files or existing scans can also be submitted after contacting the team.
During the assessment, it is useful to decide:
- Whether you need a digital file, a new print or both
- What final print size you would like
- Whether the result should remain faithful to its age
- Whether people or objects should be removed
- Whether colourisation is wanted or the original black-and-white appearance should be retained
Step 2: Creating a high-quality digital copy
Restoration quality depends heavily on the starting file. A compressed phone photo or low-resolution scan may not capture enough detail for careful repair or enlargement.
Whenever possible, the original is scanned at a resolution suited to the intended output. Larger prints, fragile photographs, albums and images requiring detailed restoration may need individual handling through a custom print scanning service.
A good scan aims to capture:
- The available facial and clothing detail
- Texture in highlights and shadows
- Fine edges around damaged areas
- The full borders of the photograph
- Enough resolution for the planned print size
The first scan is not expected to hide the damage. Its job is to record as much surviving information as possible before the digital restoration begins.
Step 3: Repairing tears, scratches and stains
The restoration specialist works through the damaged areas of the digital file. Dust and small marks may be removed individually. Tears can be rebuilt by carefully matching nearby tones, textures and patterns.
Damage across a plain studio background is usually easier to reconstruct than damage across a face, a patterned dress or a detailed group scene. Where a scratch crosses an eye or mouth, the restorer must work cautiously to avoid changing the person’s expression or identity. An automatic face-enhancement result should always be checked against the source photograph rather than accepted simply because it appears sharp.
Large missing areas may be rebuilt using information from the opposite side of the image, surrounding objects or another photograph supplied by the family. If no visual information survives, the result may require interpretation. A professional should explain that limitation rather than promise detail that the original no longer contains.
Step 4: Restoring tone, contrast and colour
Old black-and-white photographs can lose contrast or develop uneven staining. Colour prints may shift strongly towards red, yellow, blue or green as their dyes age.
Digital correction can rebalance the image, recover separation between light and dark areas and produce more natural-looking colour. The aim is not always to make an old photograph look newly captured. Often the best result keeps the texture, lighting and visual character of its era while removing distracting damage.
Over-processing can make skin look artificial, erase important texture or produce details that were never present. AI colourisation can also produce attractive but uncertain choices when the original contains no colour information. Careful restoration improves what survives without turning a family photograph into a different image.
Step 5: Reviewing the restored image
Once the main repairs are complete, the image is checked at both close magnification and normal viewing size.
This review looks for repeated textures, unnatural edges, remaining dust marks, inconsistent skin tones and repaired areas that draw attention to themselves. The file may also be prepared differently depending on whether it will be viewed on a phone, included in a memorial slideshow or printed as an enlargement.
The final result can then be supplied as a digital image, a new photographic print or both. Keeping a high-quality digital master gives the family more options for future copies.
What professional restoration cannot recover
Restoration can achieve remarkable results, but it cannot recover information that was never captured or has been completely destroyed.
For example:
- A face that is entirely missing may need to be reconstructed from another photograph.
- Severe blur cannot always be converted into genuine fine detail.
- A tiny print may not contain enough information for a very large, sharp enlargement.
- Heavy reflections in a phone photograph can hide information that a proper scan may reveal.
- Physical mould, adhesive damage or a photograph stuck to glass may require specialist conservation advice before scanning.
The most trustworthy result is one that improves the photograph while remaining honest about the limits of the source.
How to prepare a damaged photograph
Handle old photographs by their edges with clean, dry hands and keep food and drinks away from the work area. Avoid using household cleaners, water, adhesive tape or marker pens on the original.
Do not force apart photographs that are stuck together or try to remove a photograph that is firmly attached to glass or an old album page. The National Archives of Australia advises against removing attached tape and labels without conservation advice because removal can cause further damage. The National Film and Sound Archive also recommends careful edge handling and avoiding sticky labels and household cleaning products.
Place loose pieces in a clean envelope or protective sleeve and bring every fragment with you. Even a small torn section may contain useful detail.
Frequently asked questions
Does photo restoration change the original photograph?
Digital restoration is normally completed on a scan or digital copy. The physical original is not digitally altered. It should be returned and stored safely after scanning.
Can a badly faded photograph be restored?
Often, yes. Contrast and colour correction can reveal information that is difficult to see in the faded print. The final result still depends on how much image detail survives.
Can missing parts of a photograph be rebuilt?
Small missing areas can often be reconstructed using nearby detail. Large missing areas may require another reference photograph or a carefully interpreted repair.
Can someone be removed from or added to a photograph?
Pixels Plus can assess requests to remove or replace people and objects. The feasibility depends on the background, overlap between subjects and the reference material available.
Is AI photo restoration the same as professional restoration?
No. An AI tool can produce a quick enhancement, but professional restoration includes assessment, high-quality scanning, output planning, detailed checking and human decisions about what should—or should not—be reconstructed. AI may assist the work, but the original photograph remains the visual reference.
Can AI change the way a person looks?
Yes, particularly when the source face is very small, blurred or badly damaged. Generative tools may predict facial features that look realistic without being completely faithful. Supplying other photographs of the same person can help when missing facial detail needs to be reconstructed.
How much does photo restoration cost?
Restoration is quoted individually because a lightly faded image requires much less work than a torn photograph with missing facial detail. Bring the original into the store or contact Pixels Plus about submitting a digital file for assessment.
Should I scan the photograph myself first?
If you still have the original, bringing it in usually provides the best opportunity to capture useful detail. If only a digital file is available, send the highest-resolution version you have and avoid repeatedly saving or compressing it.
Give an important photograph a new life
A damaged photograph may still contain far more recoverable detail than it first appears to. The best results come from careful scanning, realistic expectations and restoration work that respects the people, place and period shown in the original.
Pixels Plus has operated in Crows Nest since 1990 and provides photo restoration, custom scanning and professional printing for customers across Sydney and the Lower North Shore.
View the Pixels Plus photo restoration service, visit 45 Willoughby Road, Crows Nest NSW 2065, or call (02) 9437 4247 to arrange an assessment.