
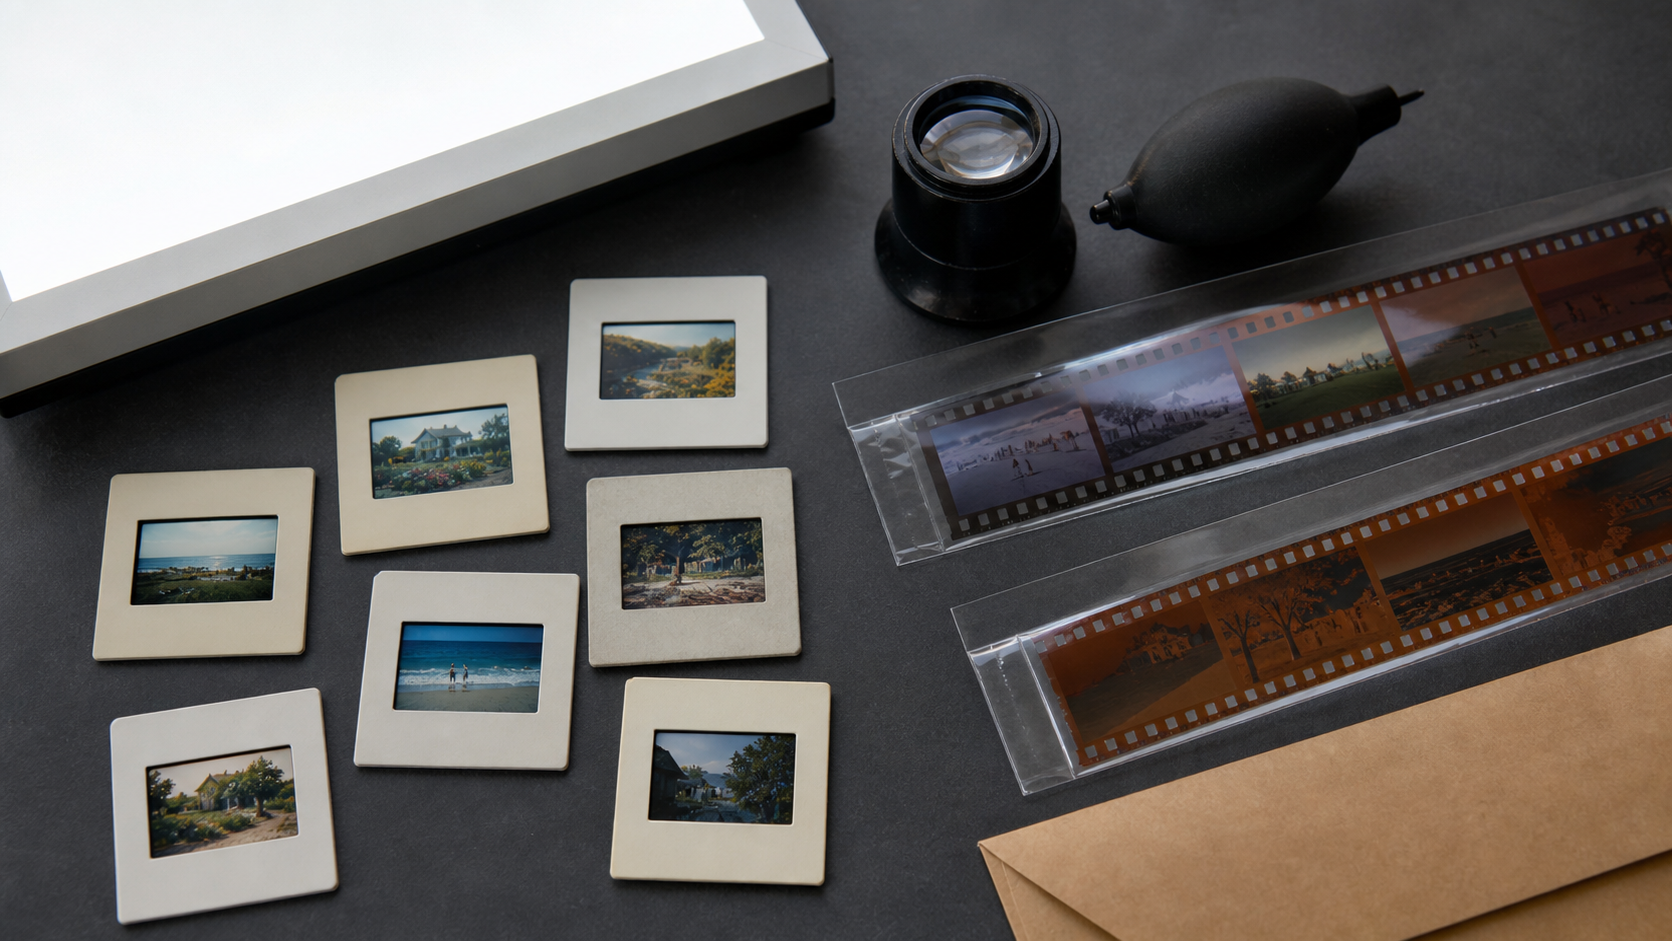
Old slides and negatives often contain photographs that have never been printed—or images that family members have not seen for decades. Digitising them makes those photographs easier to view, share, print and preserve, but it can be difficult to know where to begin when a collection contains several boxes, sleeves and film formats.
Should you scan the mounted slides first? Are negatives likely to give you a better result? What if you also have prints of the same photographs?
The short answer is that condition and family importance should guide the order. If both are in similar condition, negatives often provide excellent flexibility for colour and exposure correction, while mounted slides are usually easier to sort and identify before scanning.
Pixels Plus provides professional slide and negative scanning from its Crows Nest photo lab for customers across Sydney, the Lower North Shore and beyond.
What is the difference between a slide and a negative?
A negative records the tones and colours in reverse. On colour negative film, the image normally has an orange-brown mask, light areas appear dark and colours look unfamiliar until the frame is scanned or printed.
A slide is a positive transparency. The image appears with normal colours when held to the light or viewed through a projector. Most family slides are individual frames mounted in cardboard or plastic, although some transparency film remains in strips or sheets.
Both are original photographic film materials. Unlike a print, which is a copy made from film, a slide or negative usually contains the earliest surviving version of the image.
Slides vs negatives at a glance
| Consideration | Mounted slides | Negatives |
|---|---|---|
| Image appearance | Positive image with normal colours | Tones and colours appear reversed |
| Sorting | Usually easy to view on a light table | Often needs a loupe, contact sheet or scan |
| Handling | Mount protects the edge of each frame | Film surface is more exposed to fingerprints and scratches |
| Colour behaviour | Exposure and colour are largely fixed in the original transparency | A well-exposed negative often offers more adjustment flexibility |
| Common storage | Slide boxes, carousels and archival pages | Sleeves, envelopes, film wallets and uncut rolls |
| Common problems | Dust, fading, mould, scratched mounts and warped frames | Dust, scratches, fingerprints, curl, fading and damaged sleeves |
| Best use after scanning | Digital viewing, slideshows, sharing and printing | Digital archiving, editing, restoration and printing |
Which should you scan first?
There is no universal rule for every collection. A practical priority order is:
1. Scan deteriorating material first
Film showing mould, strong colour changes, brittleness, warping, a vinegar-like smell or damage from damp storage should be assessed before better-preserved material.
Do not try to clean mouldy or fragile film with water, household cleaners or compressed air. Keep affected items separate from the rest of the collection and ask for professional advice before handling them further.
2. Prioritise irreplaceable family events
Weddings, childhood photographs, relatives who have passed away, early family homes and images with no surviving print should move towards the front of the queue.
This is especially useful for a large archive. You do not have to digitise everything at once. Starting with one clearly labelled box or one important period can make the project manageable.
3. Choose negatives when editing flexibility matters
A well-exposed, well-preserved colour negative often retains useful detail across a wider range of tones than a colour slide. That can provide more flexibility when balancing bright skies, deep shadows and colour during scanning.
This does not mean every negative is automatically better. A badly underexposed, scratched or faded negative may produce a poorer result than a clean slide. The original exposure, film stock, processing, storage and scanner all affect the final image.
4. Choose slides when sorting speed matters
Mounted slides are easy to review on a light table because the image is already positive. Families can often identify holidays, people and dates before the scanning begins.
Slide mounts may also contain useful handwritten information. If labels matter, record them separately or ask how the scanning order can preserve that context.
5. Scan the original film before a print when possible
If you have a print and its original negative, scanning the negative will usually capture more of the information recorded by the camera. The print has already passed through another photographic process and may be cropped, faded or colour-shifted.
A print may still be the better source when the negative is missing, badly damaged or was printed using skilled darkroom adjustments that are important to the photograph's appearance.
Does negative scanning always give better quality?
Not always. Scan quality depends on more than whether the source is a slide or negative.
Important factors include:
- The film format and size
- The sharpness and exposure of the original photograph
- Dust, fingerprints, scratches and mould
- Colour fading and chemical deterioration
- Scanner resolution and optical quality
- The care taken with colour, density and tonal correction
- The size of the print you want to make
Larger film formats such as 120, 220 and 4 x 5 inch film contain a larger image area than 35mm film and can support detailed scans when the original is sharp. Small formats such as 110 and 126 may contain less detail, but scanning can still recover important family images that would otherwise remain difficult to view.
What film formats can Pixels Plus scan?
Pixels Plus can assess a wide range of photographic film, including:
- Mounted 35mm, 110, 126 and 127 slides
- 35mm colour and black-and-white negatives
- 35mm transparencies
- 110 and 126 Instamatic film
- 120 and 220 medium-format negatives and transparencies
- 4 x 5 inch large-format film
- Old Box Brownie and land-camera negatives
- Glass plates
- Microfiche film
Different materials may require different scanners and handling methods. Bring unusual film into the Crows Nest store so the team can identify the format and recommend an appropriate service.
What does professional film scanning involve?
Professional scanning is more than photographing a frame with a phone or placing several negatives on an ordinary document scanner.
The film is inspected, handled by its edges and scanned using equipment suited to the format and intended output. Depending on the selected service, colour, density and tonal adjustments can be made so the digital image is easier to view and print.
Some collections need efficient bulk scanning. Others contain a small number of important frames that justify higher-resolution scanning, detailed colour work or restoration.
Pixels Plus offers several slide-scanning options, including a bulk service for larger collections and higher-resolution scanning for images intended for restoration or large prints. The best choice depends on the number of frames, their condition and what you want to do with the files.
How to prepare slides and negatives for scanning
Good preparation protects the originals and helps preserve their order.
- Keep film in its existing sleeves or boxes. Do not remove everything and place it loose in a bag.
- Handle film by the edges. Avoid touching the image or emulsion surface.
- Group formats separately. Keep mounted slides, 35mm negatives, medium-format film and unusual formats in different labelled groups.
- Preserve the original sequence. Number boxes, sleeves or envelopes rather than writing directly on film.
- Do not cut film strips unnecessarily. Ask the lab before altering long strips or rolls.
- Do not use sticky notes or adhesive tape on film or slide mounts.
- Keep damaged material separate. Isolate mouldy, damp or strongly deteriorated film and explain its condition when requesting an assessment.
- Choose your priorities. Mark the images needed first for a family event, restoration or enlargement.
The National Archives of Australia recommends handling photographic materials carefully by their edges, avoiding direct labels on the material and using photo-safe storage. The Library of Congress similarly advises using a clean, dry work area and avoiding adhesives, rubber bands and canned air.
What should you request from your scans?
Before ordering, think about how the files will be used.
For viewing and sharing
Standard digital files may be suitable for viewing on phones, televisions and computers, sharing with relatives and making ordinary-size prints.
For restoration or enlargement
An important frame intended for detailed restoration, cropping, a large print or a mural may need a higher-resolution scan and more manual correction.
For long-term family archiving
Ask about the scan size and file format, then keep the returned files in more than one location. A practical approach is to maintain:
- One working copy on your computer
- One backup on a separate drive
- One additional copy in another safe location or reputable cloud service
Digitisation reduces the need to handle the original film, but it does not make the originals disposable. Keep slides and negatives safely stored after scanning.
Frequently asked questions
Are negatives better than slides?
Neither is always better. A colour negative often provides more flexibility for exposure and colour adjustment, while a clean slide offers a direct positive image and may be easier to sort. Condition, exposure, film format and the intended output are more important than the label alone.
Can mounted slides be scanned without removing the mounts?
Yes. Standard mounted slides are normally scanned in their mounts. Do not dismantle them unless the lab advises you to do so.
Can faded slides or negatives be improved?
Colour, density and contrast can often be improved during scanning. Severe fading, scratches, mould or missing image detail may require more extensive digital restoration. No process can guarantee recovery of information that has completely disappeared.
Why do colour negatives look orange?
Most colour negative film has an orange mask that helps the photographic printing process. Scanning software converts the negative image and compensates for the mask to produce normal-looking colours.
Should I clean film before bringing it in?
Avoid household cleaners, liquids, tissues and canned air. Improper cleaning can scratch the emulsion or cause permanent damage. Leave significant dust, mould and stuck material for assessment.
Should I keep the originals after scanning?
Yes. Digital files make photographs easier to access and back up, but the original film remains the primary photographic object and may support a better scan in the future.
Bring hidden photographs back into view
You do not need to choose between digitising every slide and every negative at once. Start with the material that is deteriorating, the family events that matter most and the film most likely to produce a useful result.
Pixels Plus has operated in Crows Nest since 1990 and provides professional film scanning, restoration and printing for customers across Sydney and the Lower North Shore.
View the Pixels Plus slides and negatives scanning service, visit 45 Willoughby Road, Crows Nest NSW 2065, or call (02) 9437 4247 to discuss your collection.